Using the terminal#
Through JupyterLab you can access the terminal for system shells.
The Unix command line is a powerful tool that allows you to interact with your computer's operating system through text-based commands via a terminal. It is widely used in various platforms, including Linux and macOS. Mastering the command line can greatly enhance your productivity and enable you to perform various tasks efficiently.
This page will guide you through the basics of the Unix command line with the following sections:
Accessing the terminal#
To access the Unix command line, you need to open a terminal.
Select File -> New -> terminal, or you can launch a terminal session from the Other launcher within the main work area:
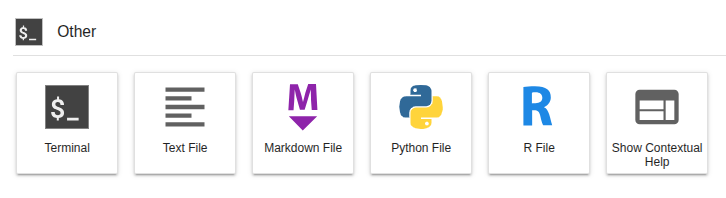
You'll get a new terminal tab in the activity bar, and will find yourself in a bash shell.
Where am I? Who am I?#
By default, you're in a bash shell running against the base operating system of the climb-jupyterhub container image (which is based on Ubuntu). You'll see in your bash prompt that you're in your home directory (represented by the tilde character ~).
jovyan:~$ pwd
/home/jovyan
Who is jovyan?
Looking at your bash prompt, you'll notice that your username is jovyan (there's a backstory, but it means 'related to Jupyter'). Why is everyone's username the same? Your notebook server is running as a container. The container instance is private and linked to your Bryn user's storage, but the image it runs is the same for everyone. As a result, it is not necessary or desirable to have unique system users.
TLDR: don't worry about it. Inside your notebook server, your username is jovyan

What about sudo?
jovyan doesn't have sudo privileges. This may seem restrictive, but we've pre-configured the climb-jupyter base image with everything you'd likely need sudo for pre-installed. Everything else should be installable via package managers, such as Conda. You'll also be able to run Nextflow against out K8s execution environment 'out-of-the-box'.
Basic Commands#
Let's start with some fundamental commands to get you acquainted with the Unix command line:
-
pwd(Print Working Directory): Displays the current directory (folder) you are in.pwd /Users/username/documents -
ls(List): Lists the files and directories in the current directory.ls file1.txt file2.txt folder1 folder2 -
cd(Change Directory): Allows you to navigate to a different directory.cd folder1 -
mkdir(Make Directory): Creates a new directory.mkdir new_folder -
touch: Creates an empty file.touch new_file.txt -
rm(Remove): Deletes files or directories.rm file1.txt rm -r folder1 -
mv(Move): Moves or renames files and directories.mv file2.txt folder2/ mv file2.txt new_filename.txt -
cp(Copy): Copies files or directories.cp file1.txt folder2/
Navigating the File System#
The Unix file system is organized in a hierarchical structure. Each directory can contain files and other directories. Here are some additional commands to help you navigate the file system:
-
cd(Change Directory): As mentioned earlier,cdallows you to change your current directory. You can use absolute or relative paths.cd /path/to/directory # Absolute path cd ../parent_directory # Relative path (move up one level) cd folder3/subfolder # Relative path (move down into subfolder) -
ls(List): You can use various options withlsto customize the output:ls -l # Long listing format with detailed information ls -a # List all files, including hidden ones (those starting with .) ls -h # Human-readable file sizes ls *.txt # List all files ending with .txt -
pwd(Print Working Directory): Useful to check where you are in the file system. -
..and.:..refers to the parent directory, while.refers to the current directory. They can be handy when constructing paths.
File Manipulation#
Now let's explore some additional commands to manipulate files:
-
cat(Concatenate): Displays the content of a file.cat file1.txt -
lessandmore: Allow you to view the content of large files interactively.Use the arrow keys to scroll, and pressless large_file.txt more another_large_file.txtqto exit. -
headandtail: Display the beginning or end of a file.head file1.txt # Show the first few lines tail file1.txt # Show the last few lines -
grep: Searches for a pattern in a file.grep "keyword" file1.txt -
wc(Word Count): Counts the number of lines, words, and characters in a file.wc file1.txt
File permissions in Linux#
File permissions in Linux are a crucial aspect of the operating system's security model. They determine who can access files and directories and what actions they can perform on them. Understanding and managing file permissions are essential skills for any Linux user and system administrator.
In Linux, every file and directory has three sets of permissions, corresponding to three different categories of users:
- Owner: The user who created the file or directory.
- Group: A group to which the file or directory belongs. Each user can be a member of multiple groups, and one of these groups is the primary group for that user.
- Others: Any user on the system who is not the owner and does not belong to the group associated with the file or directory.
For each of these categories, there are three basic types of permissions:
- Read (r): Allows the user to view the contents of a file or list the contents of a directory.
- Write (w): Allows the user to modify the contents of a file or create, delete, and rename files within a directory.
- Execute (x): For files, allows the user to execute the file as a program. For directories, it allows the user to access its contents (i.e.,
cdinto it).
Displaying File Permissions#
You can use the ls command with the -l option to display file permissions in long format:
$ ls -l
-rw-r--r-- 1 user group  4096 Jul 20 10:00 myfile.txt
drwxr-xr-x 2 user group  4096 Jul 20 10:00 mydir
In the output, the first column represents the file permissions. The first character indicates the file type (- for regular files, d for directories). The next nine characters are divided into three sets of three characters, representing permissions for owner, group, and others, respectively.
Changing File Permissions#
You can modify file permissions using the chmod command. There are two ways to specify permissions: symbolic notation and octal notation.
Symbolic Notation#
In symbolic notation, you use letters to add or remove permissions. The letters are + (add), - (remove), and = (set explicitly).
For example, to give the owner read and write permissions on a file:
$ chmod u+rw myfile.txt
To remove execute permission for others on a directory:
$ chmod o-x mydir
Octal Notation#
Octal notation represents file permissions using a three-digit number. Each digit corresponds to one of the permission sets (owner, group, others). The digits are calculated by adding the values for read (4), write (2), and execute (1) permissions.
For example, to set read, write, and execute permissions for the owner and read-only permissions for the group and others:
$ chmod 755 myfile.txt
Recursively Changing Permissions#
The chmod command can be used with the -R option to recursively change permissions for directories and their contents.
$ chmod -R 755 mydir
Special Permissions#
There are three special permissions that can be set on files and directories:
-
Setuid (SUID): When set on an executable file, it allows the user who runs the program to temporarily inherit the owner's privileges.
-
Setgid (SGID): When set on an executable file or directory, it allows the user who runs the program or creates files within the directory to inherit the group's privileges.
-
Sticky Bit: When set on a directory, it ensures that only the owner of a file within that directory can delete or rename it, even if others have write permissions on the directory.
Special permissions are represented by additional characters in the file permissions display.
About Linux Pipelines#
Pipelining, in the context of the Unix command line, refers to the practice of connecting multiple commands together in a chain, where the output of one command becomes the input of the next command. This technique allows users to perform complex operations and data processing efficiently by breaking them down into smaller, focused tasks. The concept of pipelining is one of the most powerful features of the command line and greatly enhances productivity.
How Pipelining Works#
The key to pipelining is the use of the vertical bar symbol (|). When you use the pipe symbol in a command, it takes the output of the preceding command and sends it as the input to the following command. The data is passed through the pipe from left to right, allowing each command in the pipeline to process it sequentially.
The general syntax for pipelining is as follows:
command1 | command2 | command3 ...
The output of command1 becomes the input of command2, and the output of command2 becomes the input of command3, and so on.
Benefits of Pipelining#
Pipelining offers several advantages:
-
Modularity: You can break down complex tasks into smaller, manageable steps by using multiple commands in the pipeline. Each command performs a specific operation, making the overall process more organized and easier to maintain.
-
Efficiency: Rather than generating and storing intermediate files, pipelining processes data in real-time. This approach reduces disk I/O and saves storage space, resulting in faster and more resource-efficient data processing.
-
Flexibility: You can combine existing commands or custom scripts in a pipeline to achieve specific outcomes. This flexibility allows you to tailor the process to your needs, regardless of the complexity of the task.
-
Reusability: Pipelines are easily reusable. Once you have constructed a pipeline that performs a particular task, you can reuse it with different input data without modifying the individual commands.
-
Automation: Pipelining is conducive to automation, as it enables you to create scripts and automate repetitive tasks, saving time and effort.
Examples of Pipelining#
Let's look at some practical examples of pipelining:
Example 1: Sorting and Displaying#
Suppose you have a text file named data.txt, and you want to sort its lines in alphabetical order and then display the first ten lines:
$ sort data.txt | head -n 10
Here, the sort command sorts the content of data.txt, and the sorted output is passed through the pipe to the head command, which displays the first ten lines.
Example 2: Filter and Count#
Suppose you have a log file named server.log, and you want to count how many times a particular error message occurs:
$ grep "error" server.log | wc -l
Here, the grep command searches for lines containing the word "error" in server.log, and the resulting lines are sent to wc (word count) with the -l option to count the number of occurrences.
Example 3: Download and Extract#
Suppose you want to download a compressed file from a URL and extract its contents directly without saving the file locally:
$ curl -s https://example.com/file.tar.gz | tar xz
Here, curl downloads the file and passes its output (compressed data) through the pipe to tar, which extracts the contents (x for extract, z for gzip, s for silent mode).
What is next ?#
Once you know some terminal basics, you can access your storage and run Nextflow.